Base and Cap cutters are very simple to build but may cost up to $4000 to buy.
As a small operation I didn't want to spend that much money on a simple machine
and decided to build one on my own - like everything on this website - I share this
information with everyone - free of charge.
The base and cap cutter (which is the same machine) is made up of two systems.
1. The turntable - which turns the foam
2. The wire mounting mechanism - like its name - holds the bent wire in place.
3. The hot wire power supply
The turntable
The turntable can be made as simple as taking a "lazy Suzan", placing the foam
on top of it and turning it by hand. I found a 12" lazy Suzan at the local IKEA
store and used it for a while, I later became lazy and decided that its time to
motorize it. There must be a hundred ways to motorize a lazy Suzan, I went the
extra step and built a turntable from scratch. The main reason for building it
from scratch is that I wanted to be able to place a large piece of foam on the
turntable - I needed to be able to turn a 3 foot by 3 foot block, and a lazy Suzan
was not big enough.
To motorize the turn table I used a stepper motor driver and a large NEMA34
motor. A stepper motor driver is not enough since it only drives the motor.
You need to supply the driver a pulse and direction. The direction part is simple.
Just tie it to GND or VSS and you set the direction of the rotation. The step is a
bit more complicated - but not too much. I used a 555 timer to generate
a square wave at a frequency that I can change with a potentiometer.

The higher the frequency the faster the motor runs, the faster the foam turns.
Its output (Pin 3) is connected to the stepper motor driver step input.

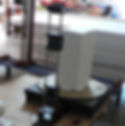
The platform on which the foam is places is made of Plexiglas. It was the material I had at the shop and we cut it on our CNC router table.
The wire mounting mechanism The wire mechanism need to be able to move in and out of the foam freely without causing the wire to vibrate, vibration on the wire will cause "waves" on the foam I took an old linear slide we once used on our CNC foam cutters and modified it so I can mount a thick wire at both ends.

The picture above shows the linear slide (the X axis - horizontal movement)
And mounted on it is the two Y shafts.
On the original design we had an ACME screw but it is not needed - it should not be
used because it will limit the travel of each carriage on the linear slide.

I took two Y carriages from our small machine (the FC2913)
One will hold one wire lead (the bottom) and the other will hold the other wire
lead (the top). The connectors are will hold in place the power cable on one side
and the hot wire on the other side
The next step is to come up with a mechanism that will hold the two carriages in
place. If not, the two carriages will simply move down due to their weight and gravity.
The simplest thing is a Delrin piece drill it the the same diameter as the shaft and
slide it on the shaft..

Picture out of focus, but you can see that the Delrin piece hold the carriage in place.

The picture above shows the linear slide and the two carriages (top and bottom)

The next step is to bend the wire - the wire should be thick enough, but at the same
time, not too thick. If the wire is too thick you will have to run too much current
through it - bad for the power supply and bad for the foam (will tend to burn)
If the wire is too thin, it will not keep its shape, bad for the foam.
The next thing is to place the linear slide next to the turn table - in our design
We made an opening in the turn table so the linear slide can be placed
under the turntable. this enables us to get the wire as close as possible
to the foam.
Turn on the power and move the tower towards the foam.

and a closeup

and another test

One thing I forgot - the power supply.
No pictures here but the concept is simple
Since the thick wire needs a lot of current you will need a low voltage
high current transformer - its input should be variable so the output is
also variable. I used a 110V to 20V 25A transformer (yes a big one)
The normal current for a 20" wire to get hot enough to cut the foam
is between 10A to 20A. As a variable source we used a simple router
speed control available at Harbor Freight for $9.99
Here is a video that shows another machine cutting a cap
Same idea different approach
Similar idea - a turn table step by step - another project...